Heart and Chain Sweater - Ivory Dress Ver.
On this page 5 sections
- Project recap
- Size
- Pattern design and modifications
- Slip rib stitch pattern in the body
- Left front and right front
- Joining the left and right front
- Avoid holes in the arm pit
- To maintain the slip rib panel after working in the round
- Lengthen the body
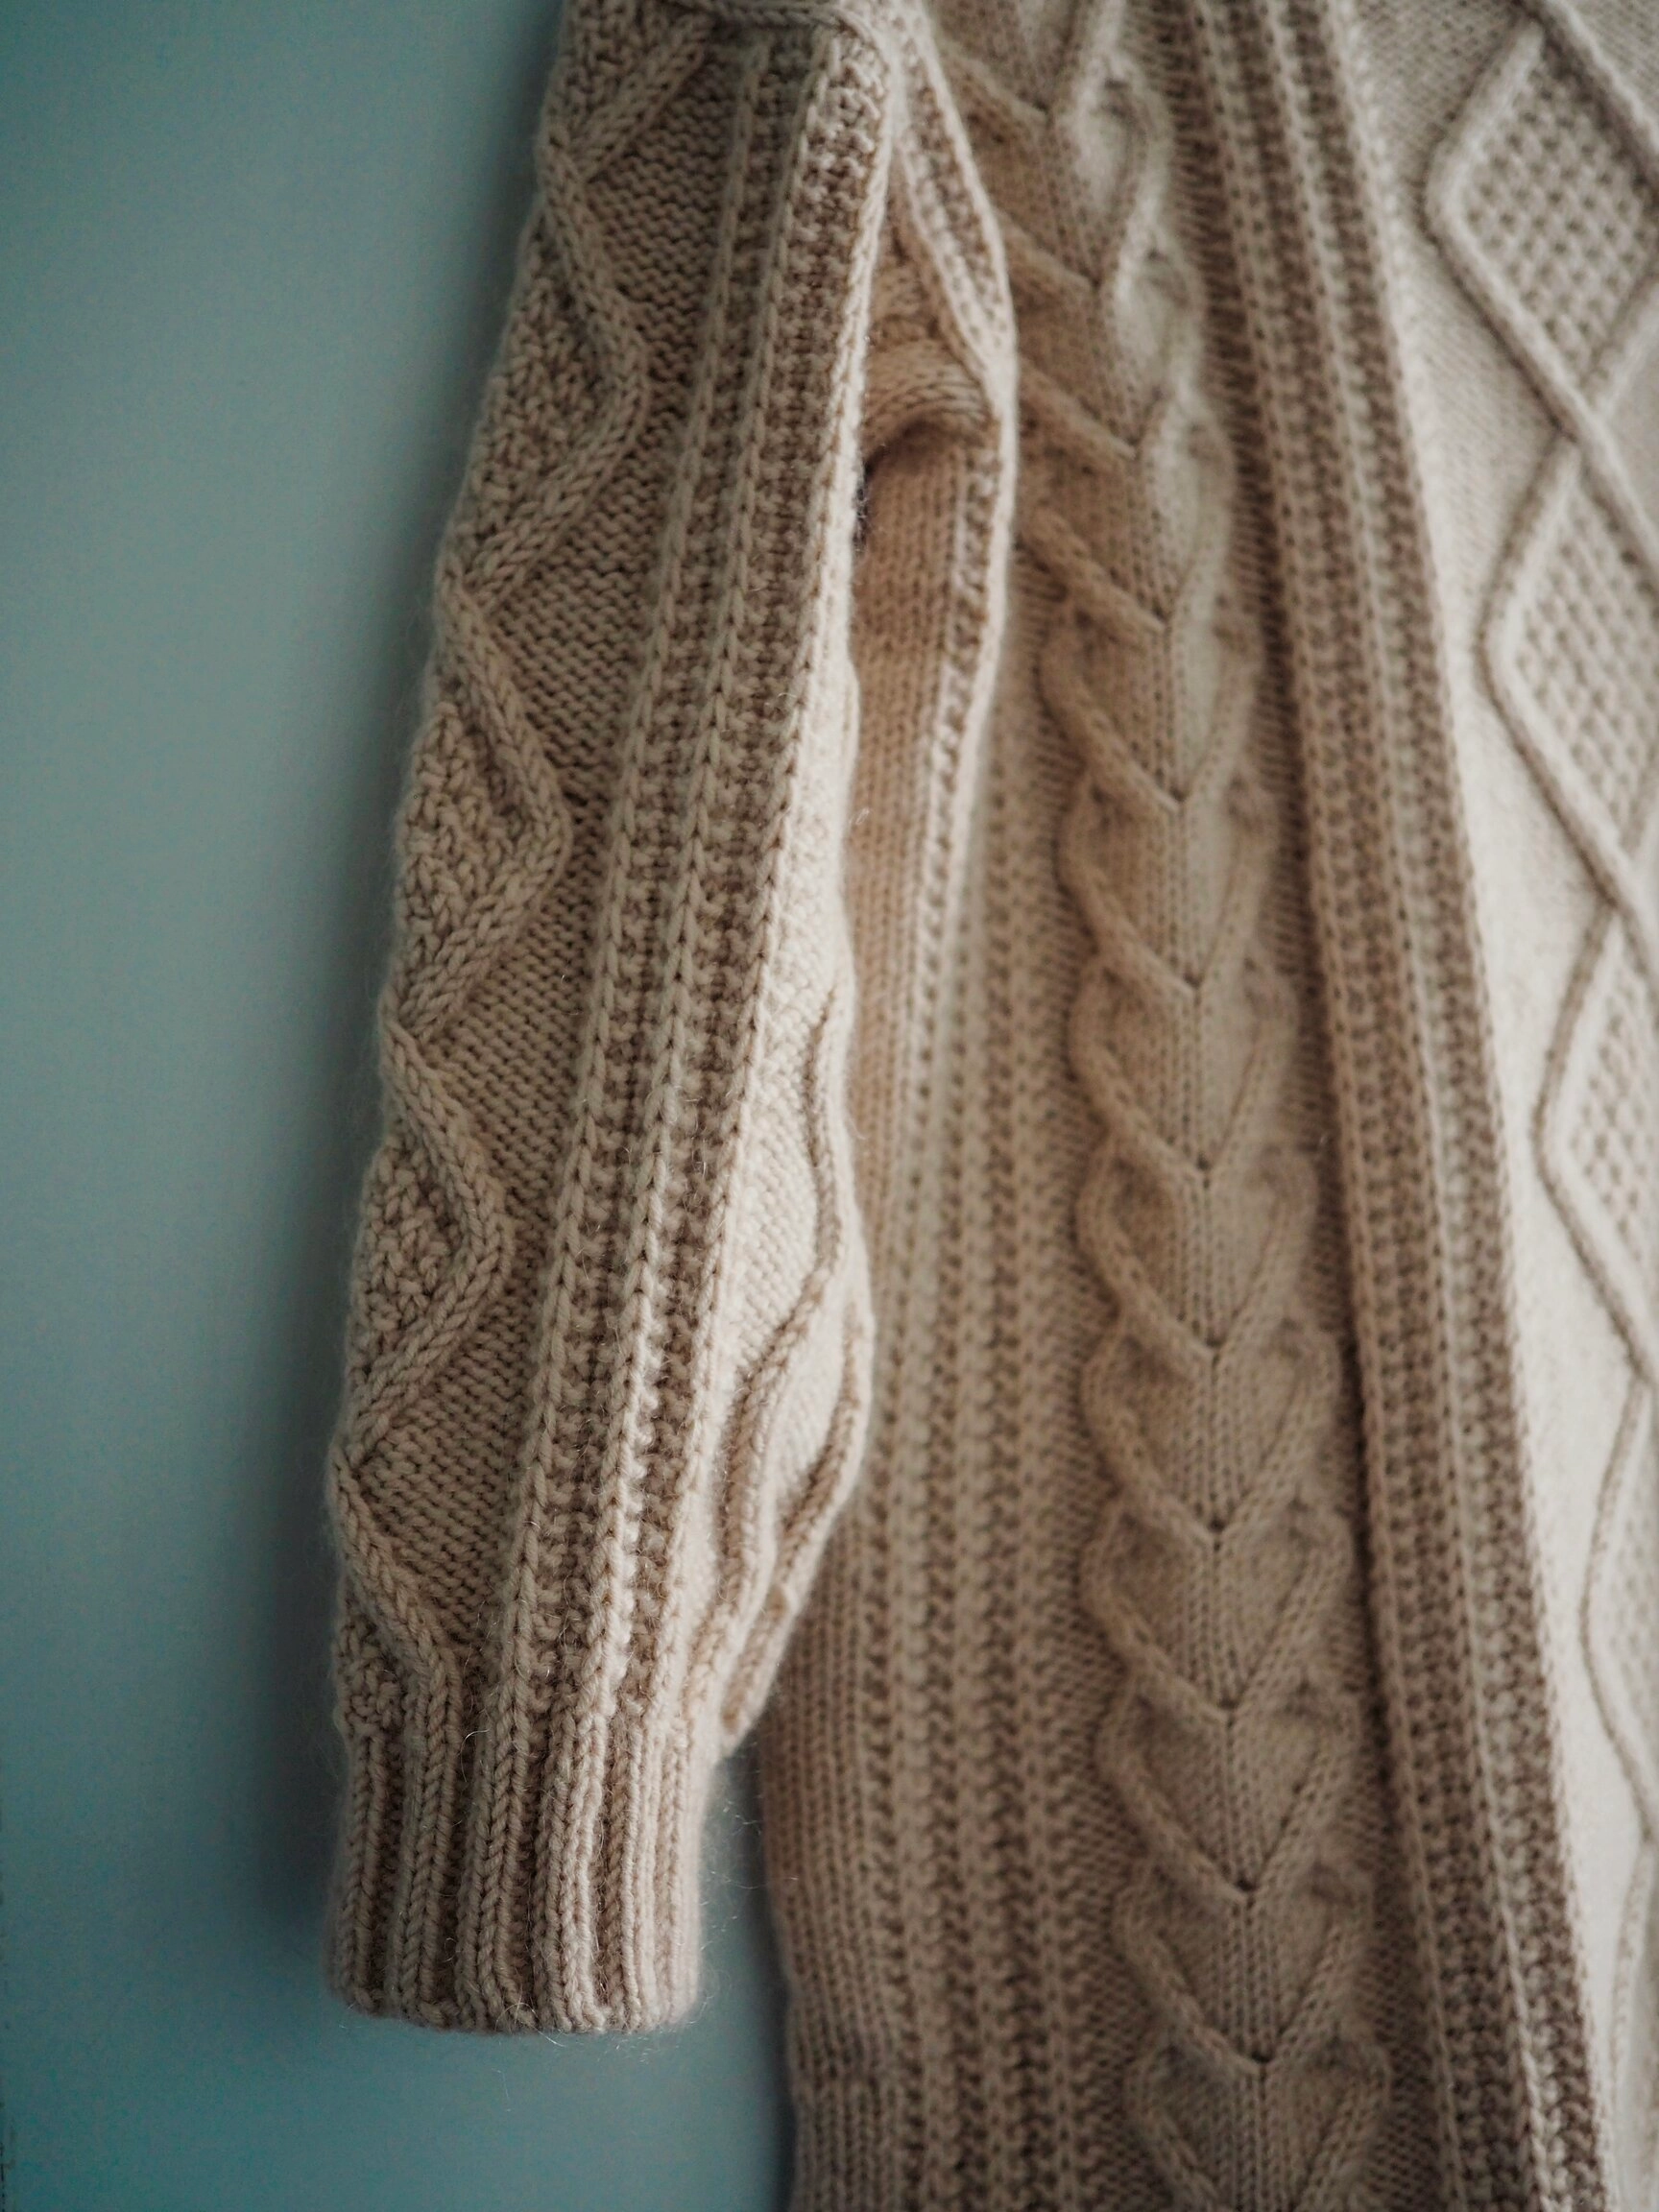
- Slip rib in sleeves
- Lengthen the sleeves
- More relaxed sleeves
- Bind off for ribbing
- Project timeline
- New techniques learned
- Knitting journal14
Project recap
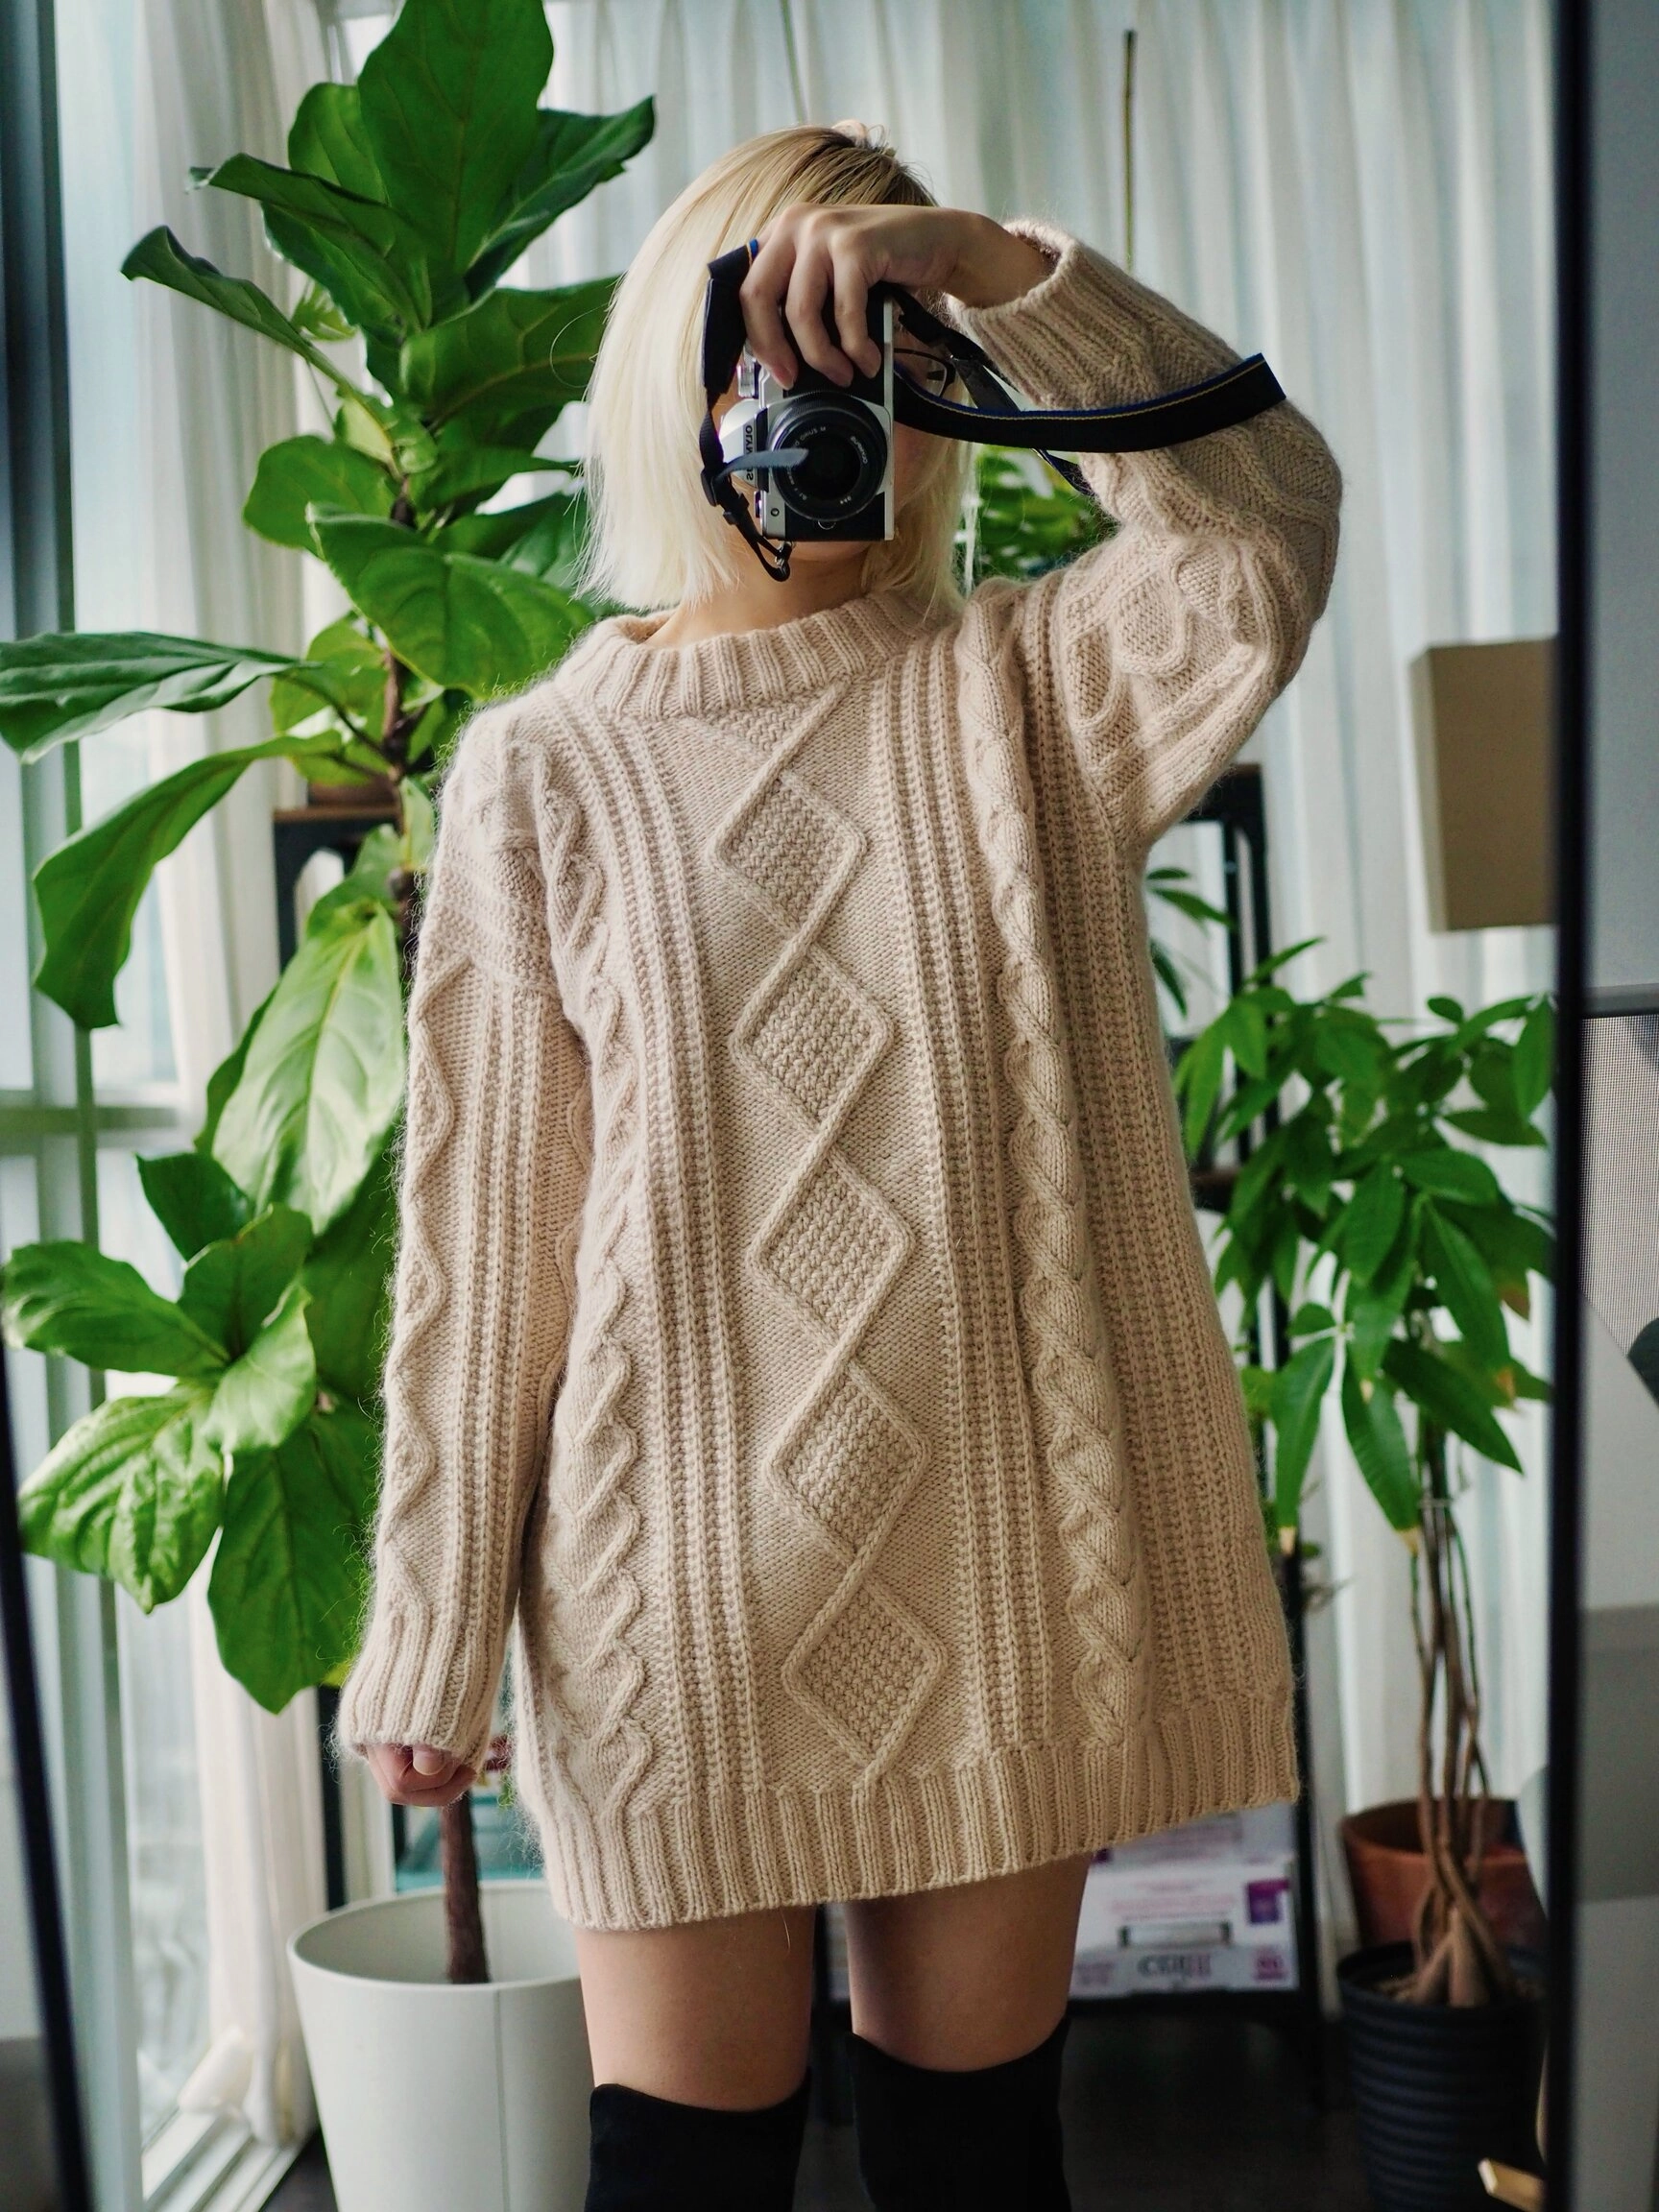
- Ravelry: PurringYarn’s Heart Chain Sweater - Ivory Dress Ver.
- Time spent: 111 hours
- Yarn:
- Solid: Loveyarn 回归线 溯原(米红)
- Mohair: Loveyarn 回归线 慕顏(米杏)
- Needle: US 7/4.5mm, US 5/3.75mm (rib)
- Gauge: 18 sts = 4''
- Duration: -
- Pattern: Heart Chain Sweater by From Mayo
Size
I’m knitting size S with US 7 in order to achieve the gauge and desired measurement. I have to lengthen the chart A LOT because my row gauge is way smaller due to the smaller needle.
After blocking, the bust is appx. 40" with 9.4" positive ease, and the length is 29.5".

Pattern design and modifications
Slip rib stitch pattern in the body
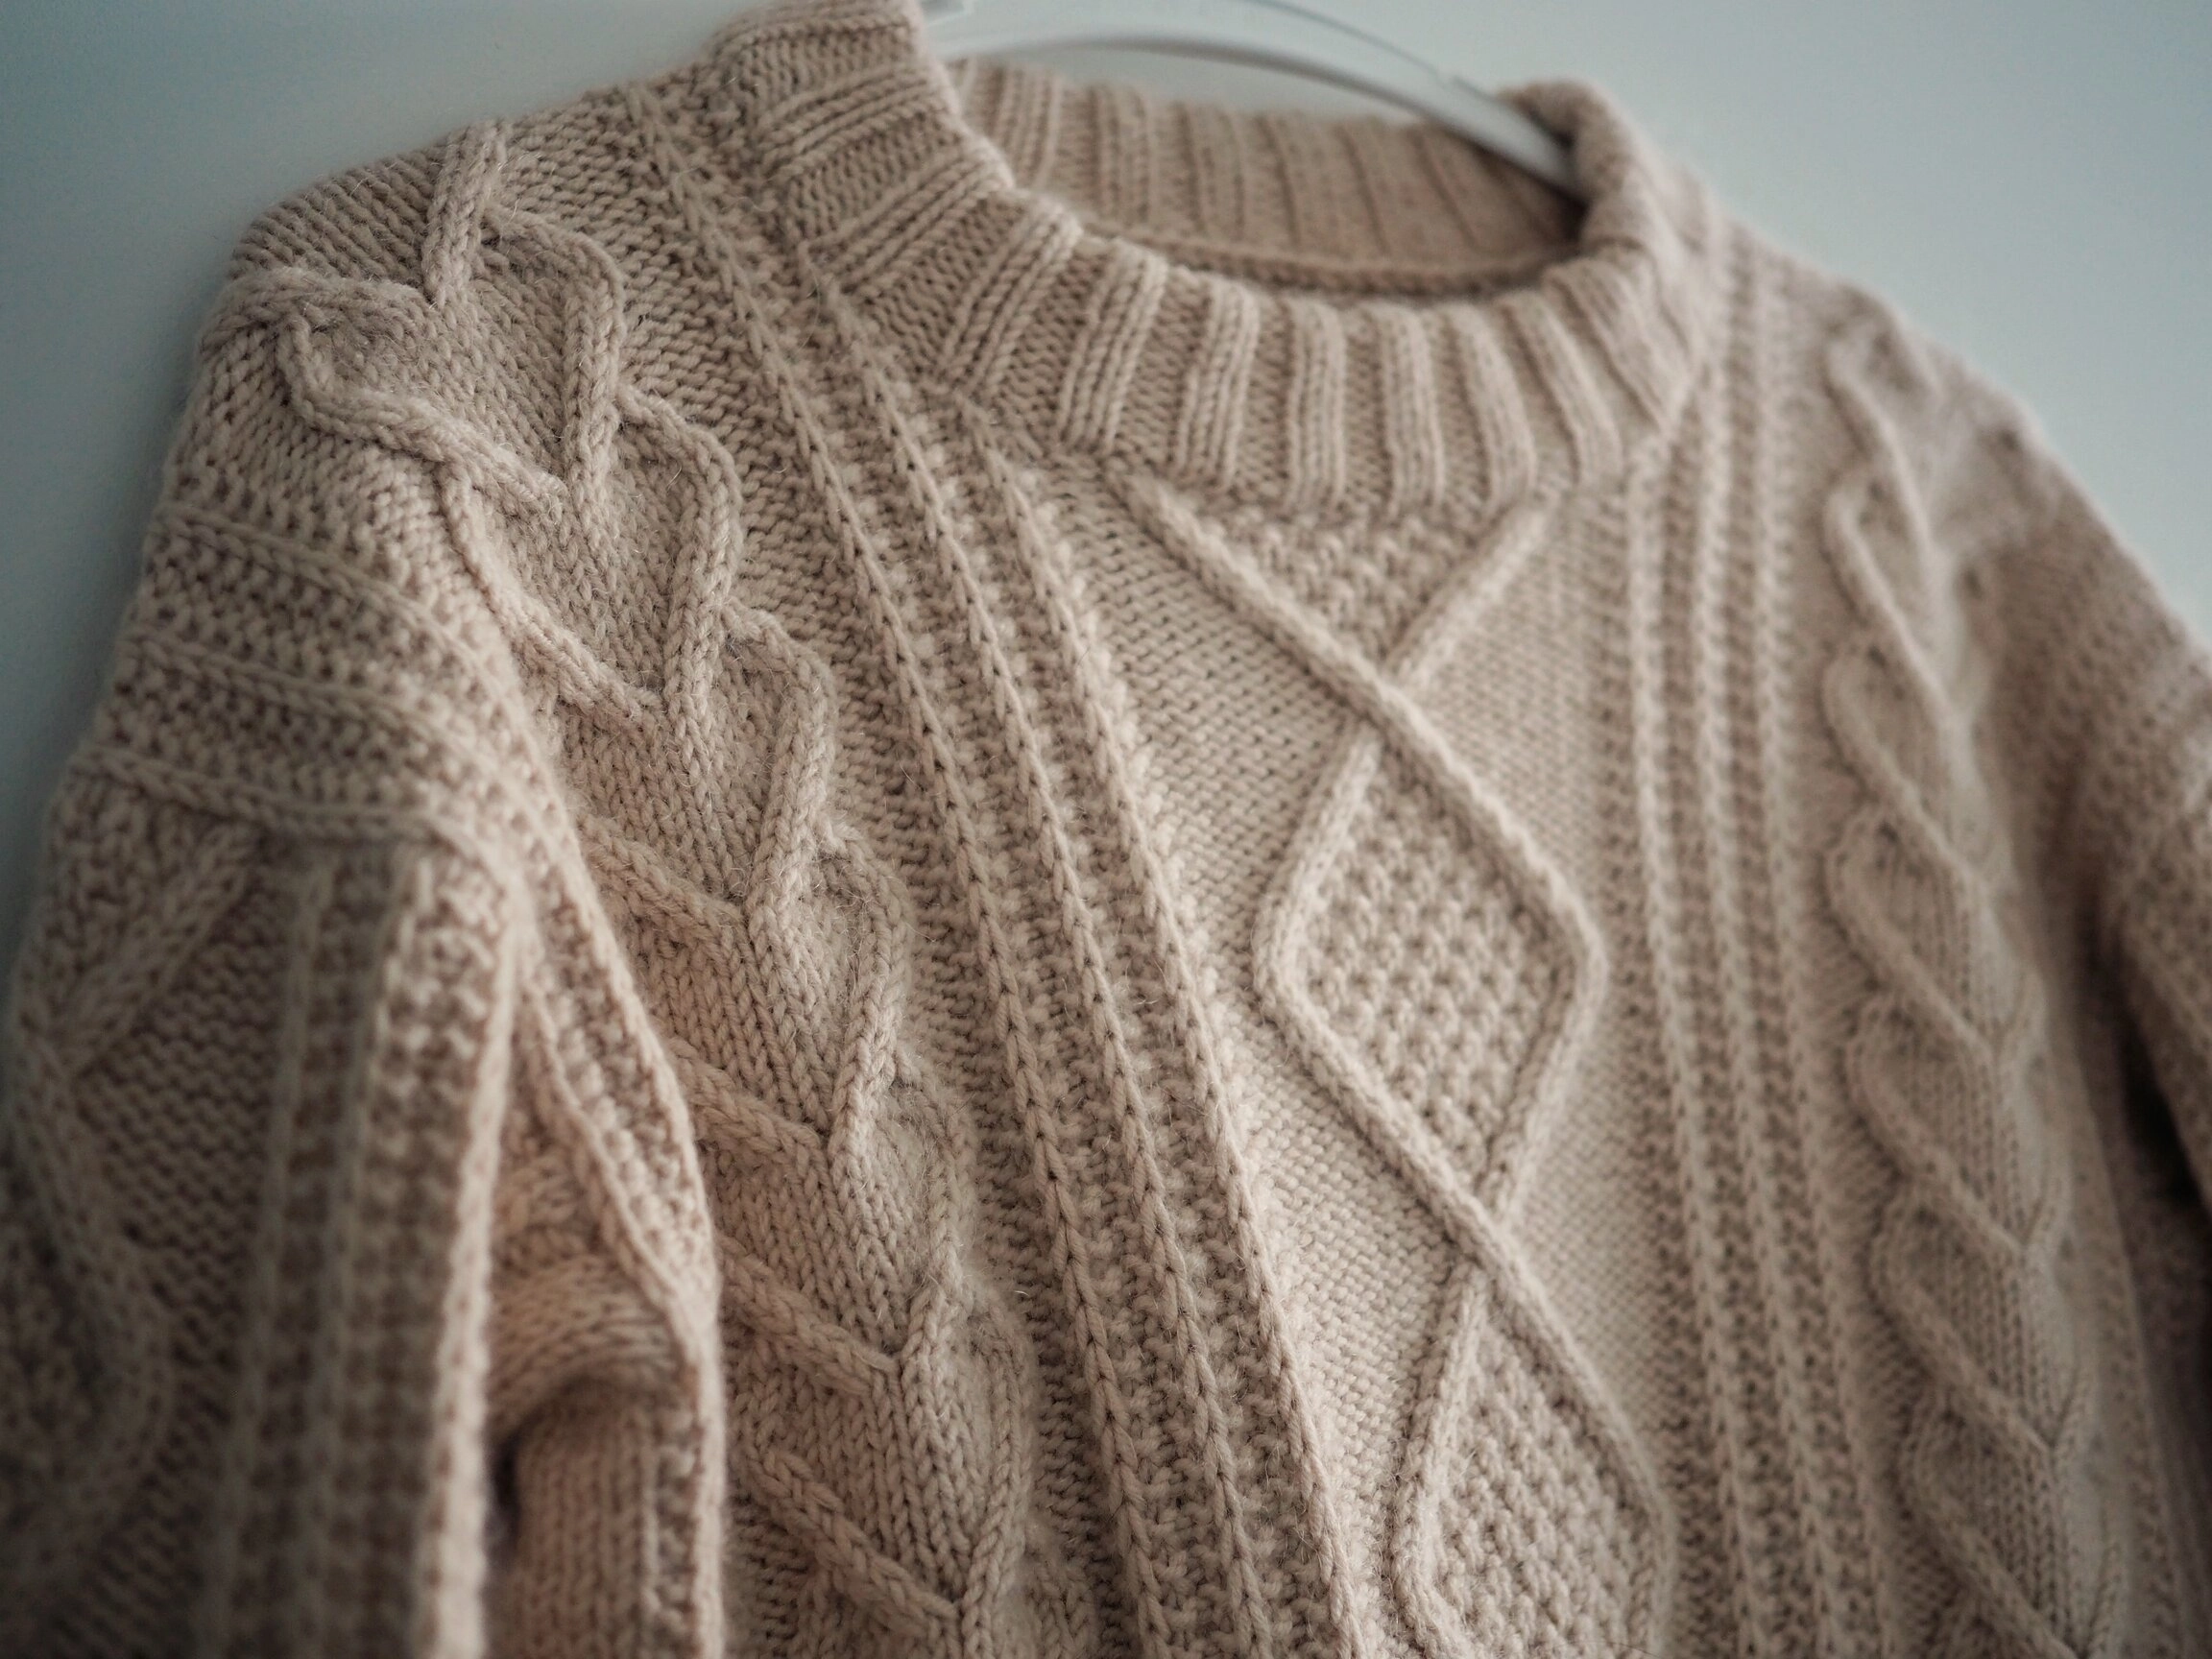
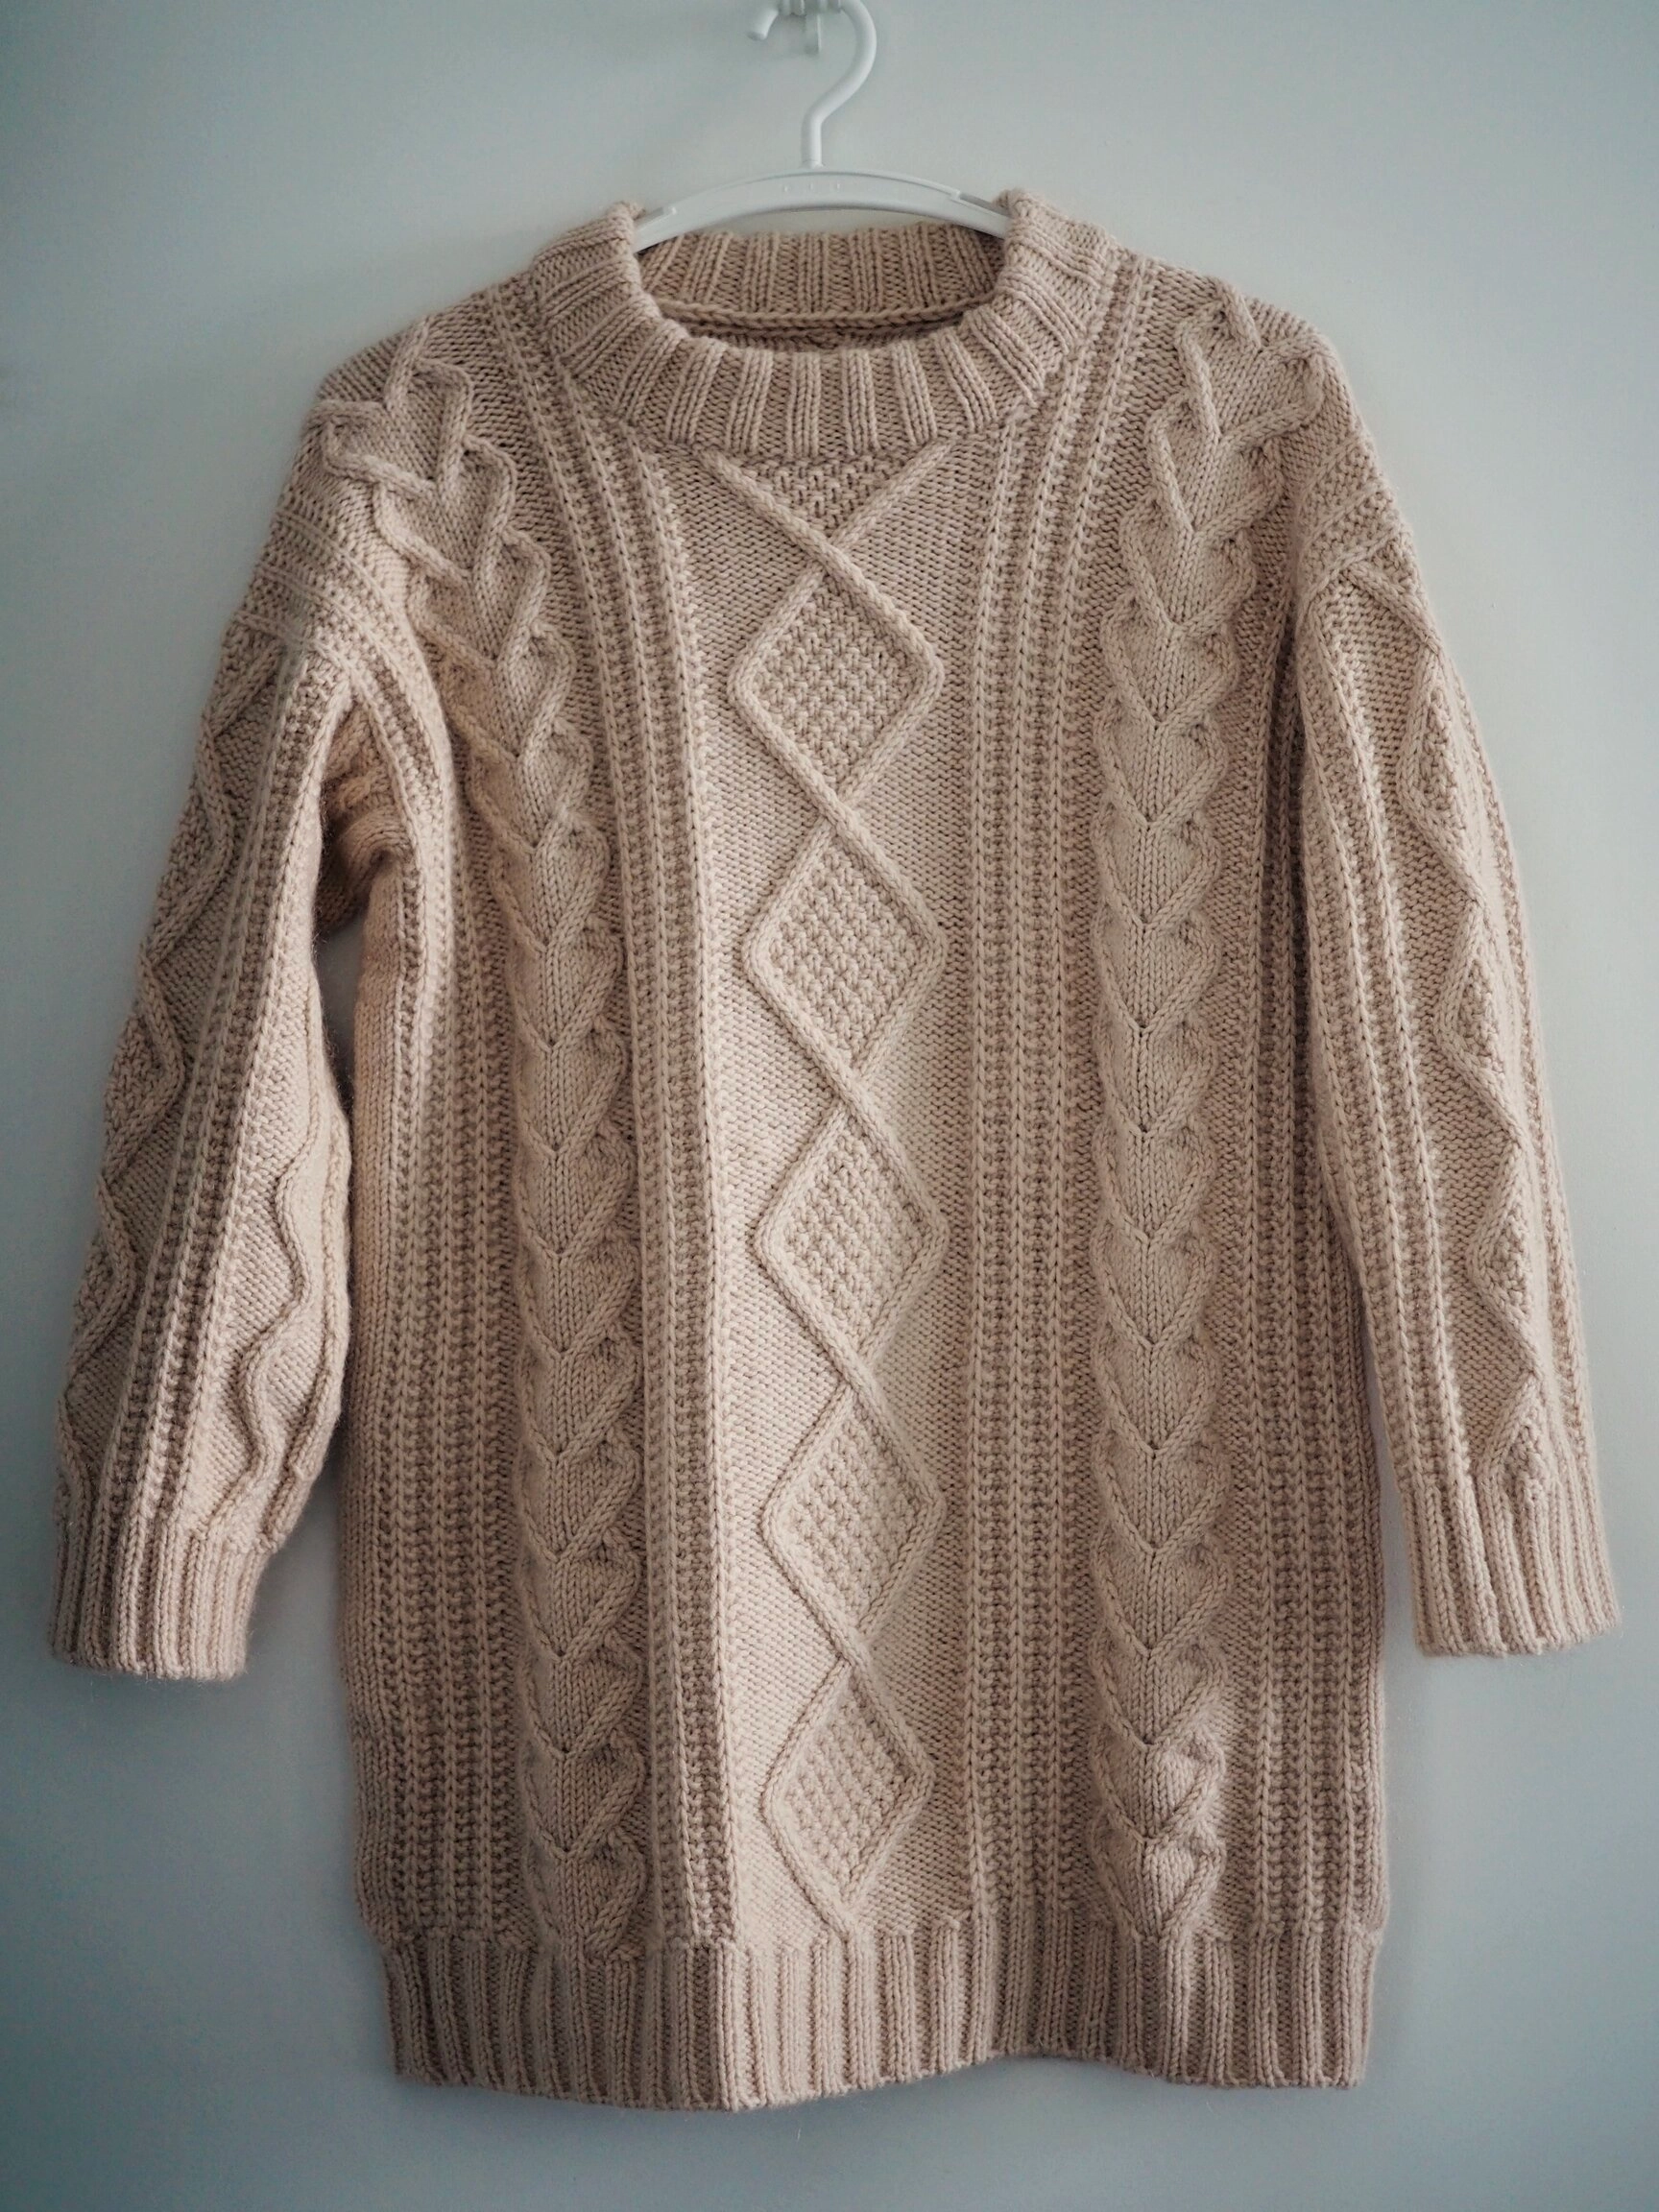
I’m planning for this sweater for a while and intend to make it as an oversized sweater dress. The original pattern has too many cables to my liking and I want a more minimalistic style, like the one I found on the internet. My idea is to replace the small cable with a slip rib pattern (I’m thinking incorporating the stitch pattern in the No Purl Scarf), so it will have diamond in the middle, and slip rib and heart cable on the side.
The challenge is that the count of sts in the pattern does not corresponded to slip rib pattern, and it only applies to working in flat, so I did few samples to test whether it can be maintained when working flat and then in the round. After some trial and error, I finally figure it out.
- To get started:
- Divide the each cable chart into heart/diamond/cable sections
- For size S, instead of casting on 10 sts in each cable section, CO 11 sts instead, because the slip rib pattern needs a multiple of 4 + 3 stitches. This will be the slip rib section(s).
- Start with working in flat when it comes to the slip rib section:
- Row 1 (RS): k3, *sl1wyif, k3, repeat from * to end of row
- Row 2 (WS): k1, *sl1wyif, k3, repeat from * to last two stitches, sl1wyif, k1
- Repeat rows 1 and 2
- Keep working in slip rib section as follows after joining in the round:
- Row 1 (RS): p1, *sl1wyib, p3, repeat from * to last two stitches, sl1wyib, p1
- Row 2 (WS): k3, *sl1wyif, k3, repeat from * to end of row
Left front and right front
A slip rib section (5 sts in size S) will replace the stockinette section.
Selvage stitch edge and increase for left front
- (Left front) Start the slip rib section in row 2: k1, sl1wyif, k3.
- In the following round, continue slip rib pattern as in working in the round. When the pattern asked for increase, use backwards loop method to maintain the slip rib pattern.
- Also use the following to keep a selvage st edge for easier picking up:
- WS: slwyif the last stitch
- RS: k1 the first stitch
Selvage stitch edge and increase for right front
- (Right front) Start the slip rib section in row 2: k3, sl1wyif, k1.
- In the following round, continue slip rib pattern as in working in the round. When the pattern asked for increase, use backwards loop method to maintain the slip rib pattern.
- Also use the following to keep a selvage st edge for easier picking up:
- WS: slwyif the first stitch
- RS: k1 the last stitch
Joining the left and right front
- Using cable cast on for the front stitches CO, and also CO an extra st at the end of CO edge and bind it off to get a smoother transition without hole.
Avoid holes in the arm pit
- Rnd 1: When joining front and back, CO 8 sts on each side, using cable cast on. Bind the last CO st off with the next one (7 CO sts)
- Rnd 2: In the following round, when encountering the gap before the 1st CO st (aka last st of the slip rib panel), do a lifted decrease to close the gap. Knit all CO sts. (7 CO sts)
- Rnd 3: Knit all CO sts
- Rnd 4: For the first CO st, k2tog (6 CO sts)
To maintain the slip rib panel after working in the round
- Row 1 (the row when joining front and back): k3, *sl1wyif, k3, repeat from * to end of row
- Row 2: p1, *sl1wyib, p3, repeat from * to last two stitches, sl1wyib, p1 Repeat the two rows
Lengthen the body
I knitted total 5.5 diamonds in the front. Here is how to lengthen the chart: After row 102:
- Repeat heart pattern from row 103-114
- Repeat diamond pattern from 71-102
I achieved the desired length when I’m at five and half diamonds, ending at row row 114.
Slip rib in sleeves
- Row 3: replace the 10 sts cable section with the slip rib stitch pattern: p1, *sl1wyib, p3, repeat from * to last two stitches, sl1wyib, p1. Decrease the last 2 sts by k2tog
- Row 4: continue the chart and the slip rib stitch pattern
Lengthen the sleeves
After row 85:
- Repeat diamond pattern from row 62-074
- Repeat cable waves pattern from row 66-78
More relaxed sleeves
- Stop decrease once finishing row 41
- Resume decrease from row 65. Starting this round, do decrease as if it’s in row 49
Bind off for ribbing
Use folded collar for the neck. For other ribbing in cuff and body, use invisible Italian bind off.
Project timeline
- – Planning.
- – Cast on.
- – Finish the back panel.
- – Finish the left and right front panel, joining the front.
- – Joining front and back.
- – Finish the collar in a day. Continue the endless aran in the body…
- - Put body on hold and pick up the sleeves stitches.
- - Finish the right sleeve.
- - Finish the rest of body and block.
New techniques learned
- Folded collar
- I also tried adding a GSR in the body ribbing because it’s said most people has neater result inside of the ribbing. Unfortunately this trick didn’t work well for me. I can’t tell any difference at all! Looking from the bright side, I guess it means my ribbing tension is quite even.
Knitting journal
I’m planning for this sweater for a while and intend to make it as an oversized sweater dress. The original pattern has too many cables to my liking and I want a more minimalistic style, aka like the one I found on the internet. My idea is to replace the small cable with a slip rib pattern (like the one in the No Purl Scarf), so it has diamond in the middle, and slip rib and heart cable on the side.
The challenge is that the count of sts in the pattern does not corresponded to slip rib pattern, and it only applies to working in flat, so I did few samples to test whether it can be maintained when working flat and then in the round.
After some trial and error, I think I finally figure it out:
- Start with working in flat: cast on a multiple of 4 + 3 stitches (I should add one more to the pattern chart as it only has 10)
- Row 1 (RS): k3, *sl1wyif, k3, repeat from * to end of row
- Row 2 (WS): k1, *sl1wyif, k3, repeat from * to last two stitches, sl1wyif, k1
- Repeat rows 1 and 2
- After joining in the round:
- Row 1 (RS): p1, *sl1wyib, p3, repeat from * to last two stitches, sl1wyib, p1
- Row 2: k3, *sl1wyif, k3, repeat from * to end of row
Reference: No-Purl Rib Stitch | KnitQ
- Start with working in flat: cast on a multiple of 4 + 3 stitches (I should add one more to the pattern chart as it only has 10)
- 3 days later
OMG this pattern is more complicated than I thought. Or it could just be me not able to read the charts that have reverse abbreviation :( Besides the chart is sooo small and it’s hurting my eyes. I kinda missed the Sirona pattern because it includes such a detailed written instruction, however, if I want to knit any Japanese (or Asian pattern I guess?) pattern, I should adapt to it.
Anyways, now that I figured it out the slip rib section, it’s a matter of correctly implementing it into the chart. The reversed abbr definitely added some difficulty here and I have to be extra careful. Hope it’s just for the first few rows and once it’s established, it will become easier.
And I haven’t thought much about the part of picking up stitches. I think I should be able to read the stitches and adjust them accordingly on the go.
- 1 day later
I ripped off the CO yesterday and started over because I want the edge to be consistent with my slip rib pattern. It looks really neat!! I feel good about my mods.
It wasn’t easy because I have to adjust the short row. The pattern chart is so small so I have to edit the pdf on Goodnotes. It took me some time but after that, it’s much easier to follow as I marked them with text, not symbol. The reason I didn’t use the symbol is because the pattern symbol designer was using was inverse with what I usually see on the pattern, and I don’t want to mess up with my mind. At the beginning I had a very difficult time following the chart because of the inverse symbol, but once the pattern is established, it gets easier and becomes more interesting. I love working cables!
- 3 days later
Used up one ball of 回归线 溯原, I’m on 52 rows when joining a new ball of yarn.
Finished the back panel. I’m picking up the stitches for left front and it took me a while to achieve the perfect result to make the pattern as smooth as possible.
- 1 day later
I finish the left and right front panel in a day, and just joining both for the front.
I did the following mods to achieve the selvage edge for left and right front. It looks nice and I hope it will make picking up the collar easier later. I also used cable cast on when joining the front.
Selvage edge and increase for left front
The selvage edge for left front panel is more like an experiment round. I changed the way in the middle and realize I should have sticked with one for all rows. Anyways.
- Pick up 6 sts for the slip rib panel (original 5 plus 1 extra). The first pick up stitch is the slip stitch.
- For row 2 to row 21, knit as the slip stitch pattern, aka
- WS: slwyif the last stitch
- RS: k1 the first stitch
- For row 22 to the following row, do as follow:
- WS: purl the last stitch
- RS: slwyib the first stitch. Increase a stitch after the 1st, by using backloop method to keep the slip rib pattern
Selvage edge and increase for right front
- WS: slwyif the first stitch
- RS: k1 the last stitch
- For each increase, I use backloop cast on before the last stitch on the right side
I measured the size and the current bust width is appx. 45cm. I’m a bit worried it does not have the oversize boyfriend look, but after comparing my cable pattern gauge vs. the pattern, it doesn’t seem to have much of a difference so it should be ok I guess.
- 2 days later
Used up 2nd ball of 回归线 溯原 when knitting the front panel (meanwhile the 1st ball of the mohair yarn still remains). I’m currently on row 58th so probably will joining the back tomorrow or the day after.
- 1 day later
Wow, it took me way much longer to finish the joining front and back than I expected. Mostly because I went back to fix the holes in the armpit. Eventually here are what I did:
- Rnd 1: When joining front and back, CO 8 sts on each side, using cable cast on. Bind the last CO st off with the next one (7 CO sts)
- Rnd 2: In the following round, when encountering the gap before the 1st CO st (aka last st of the slip rib panel), do a lifted decrease to close the gap. Knit all CO sts. (7 CO sts)
- Rnd 3: Knit all CO sts
- Rnd 4: For the first CO st, k2tog (6 CO sts)
To maintain the slip rib panel:
- Row 71 (joining front and back): k3, *sl1wyif, k3, repeat from * to end of row
- Row 72: p1, *sl1wyib, p3, repeat from * to last two stitches, sl1wyib, p1 Repeat the two rows
I think I finally was able to memorize all the cable legends! I still need to look at the chart though as I don’t know about the repeat. I also fixed a wrong cable 5 rows below so I’m very proud of myself. Yay!
- 9 days later
Measurement
Pre-mid-blocking:
- Front length: 11"
- Back length: 12.5"
- Bust: 18"
- Length of a diamond: 4.25"
After mid-blocking:
- Front length: 10.75"
- Back length: 13"
- Bust: 19"
- Length of a diamond: 4"
I have completed two and half diamonds. This is almost the same as the pattern picture but still looks quite short. After measuring, I found that although my stitch gauge is similar to the pattern, my row gauge is way tighter. Fair enough, cuz my needles are two sizes down.
But this means I have to knit much longer diamonds!! I originally thought 4 should be enough, and now it should be 5 total (based on the length to the middle of my thigh), so right now I’m only half through it. Based on my knitting speed yesterday, it’s 10 mins per 204 sts per row, so it will take me appx. 800 minutes ≈ 13 hours to finish rest of the cable. Damn this takes longer than I thought!
- 1 day later
Ok so I’m almost finished three and half diamonds in the front, while I just used up the 2nd skein of mohair. It’s getting a bit tedious for me now and I’m thinking I should probably switch to the collar and sleeves first, in case I don’t have enough yarn.
- 2 days later
I finished the folded collar yesterday. It looks quite neat and the neck depth is awesome. I love it!
Measuring the yarn for the remaining to see if I have enough: starting a new skein of 50g, I’m in the middle of row 161, heart repeat row 11 and diamond row 27.
- 3 days later
Knitted a little more than four and half diamonds in the front. I think the length might be enough but unsure. Also I don’t know if I have enough yarn. Assuming two sleeves together would take the same amount of the body, then the sleeves chart would take appx. 4 skeins total, that leaves me 2 skeins remaining.
After tried it on, I felt the bust measurement could be bigger, it doesn’t have the oversize, boyfriend style that I hoped for, but this looks cute regardless! I hope it turn out better after blocking.
I left the body as it is and started picking up sleeves stitches. It’s tricky to pick up the amount of stitches the pattern asked for, so I ended up picking up everything I can (116 sts), and then decrease 38 sts in row 2.
- 2 days later
It’s endless…!!
I used up one skein for left sleeve already (on row 64, 2 and half diamonds). Looking at the length, it would take another 2 diamonds plus ribbing. I’m really not sure if I have enough yarn now!
The sweater is getting soooo heavy and it’s started hard to manage everything, and the remaining skein of the body also drove me crazy a little. At least I should be able to finish one sleeve by this weekend.
- 1 day later
Finished the right sleeve and got 15g left for the 2nd skein, meaning one sleeve costs 85g merino yarn. That leaves me 130g merino for the remaining body. I think I have enough to finish it off!
I knitted few rows of body before picking up the 2nd sleeve. The length is okay-ish but I’m still not sure about it. Another half diamond would make it more suitable to dress alone, on the other hand, leave the length as it is (plus ribbing) is probably the more attractive option. Still undecided, so I started the left sleeve.
This time, instead of picking up two stitches from each V, I picked up 4 st from 3 Vs, so V, V, double V. This gives me 88 sts, and I was able to decrease to 80 sts in the following round by doing * k9, k2tog *, repeat from * to * 8 times.
- 8 days later
OMG it looks gorgeous on me after blocking!! The size is perfect - I pulled it horizontally a bit on purpose because I’m worried it’s not oversized enough, but it turned out to be a very relaxed fit. I don’t think I need to pull it so hard next time. Love love love it, looks so cute 🥰🥰🥰
From the knitting circle
Comments