Orbits Sweater
On this page 7 sections
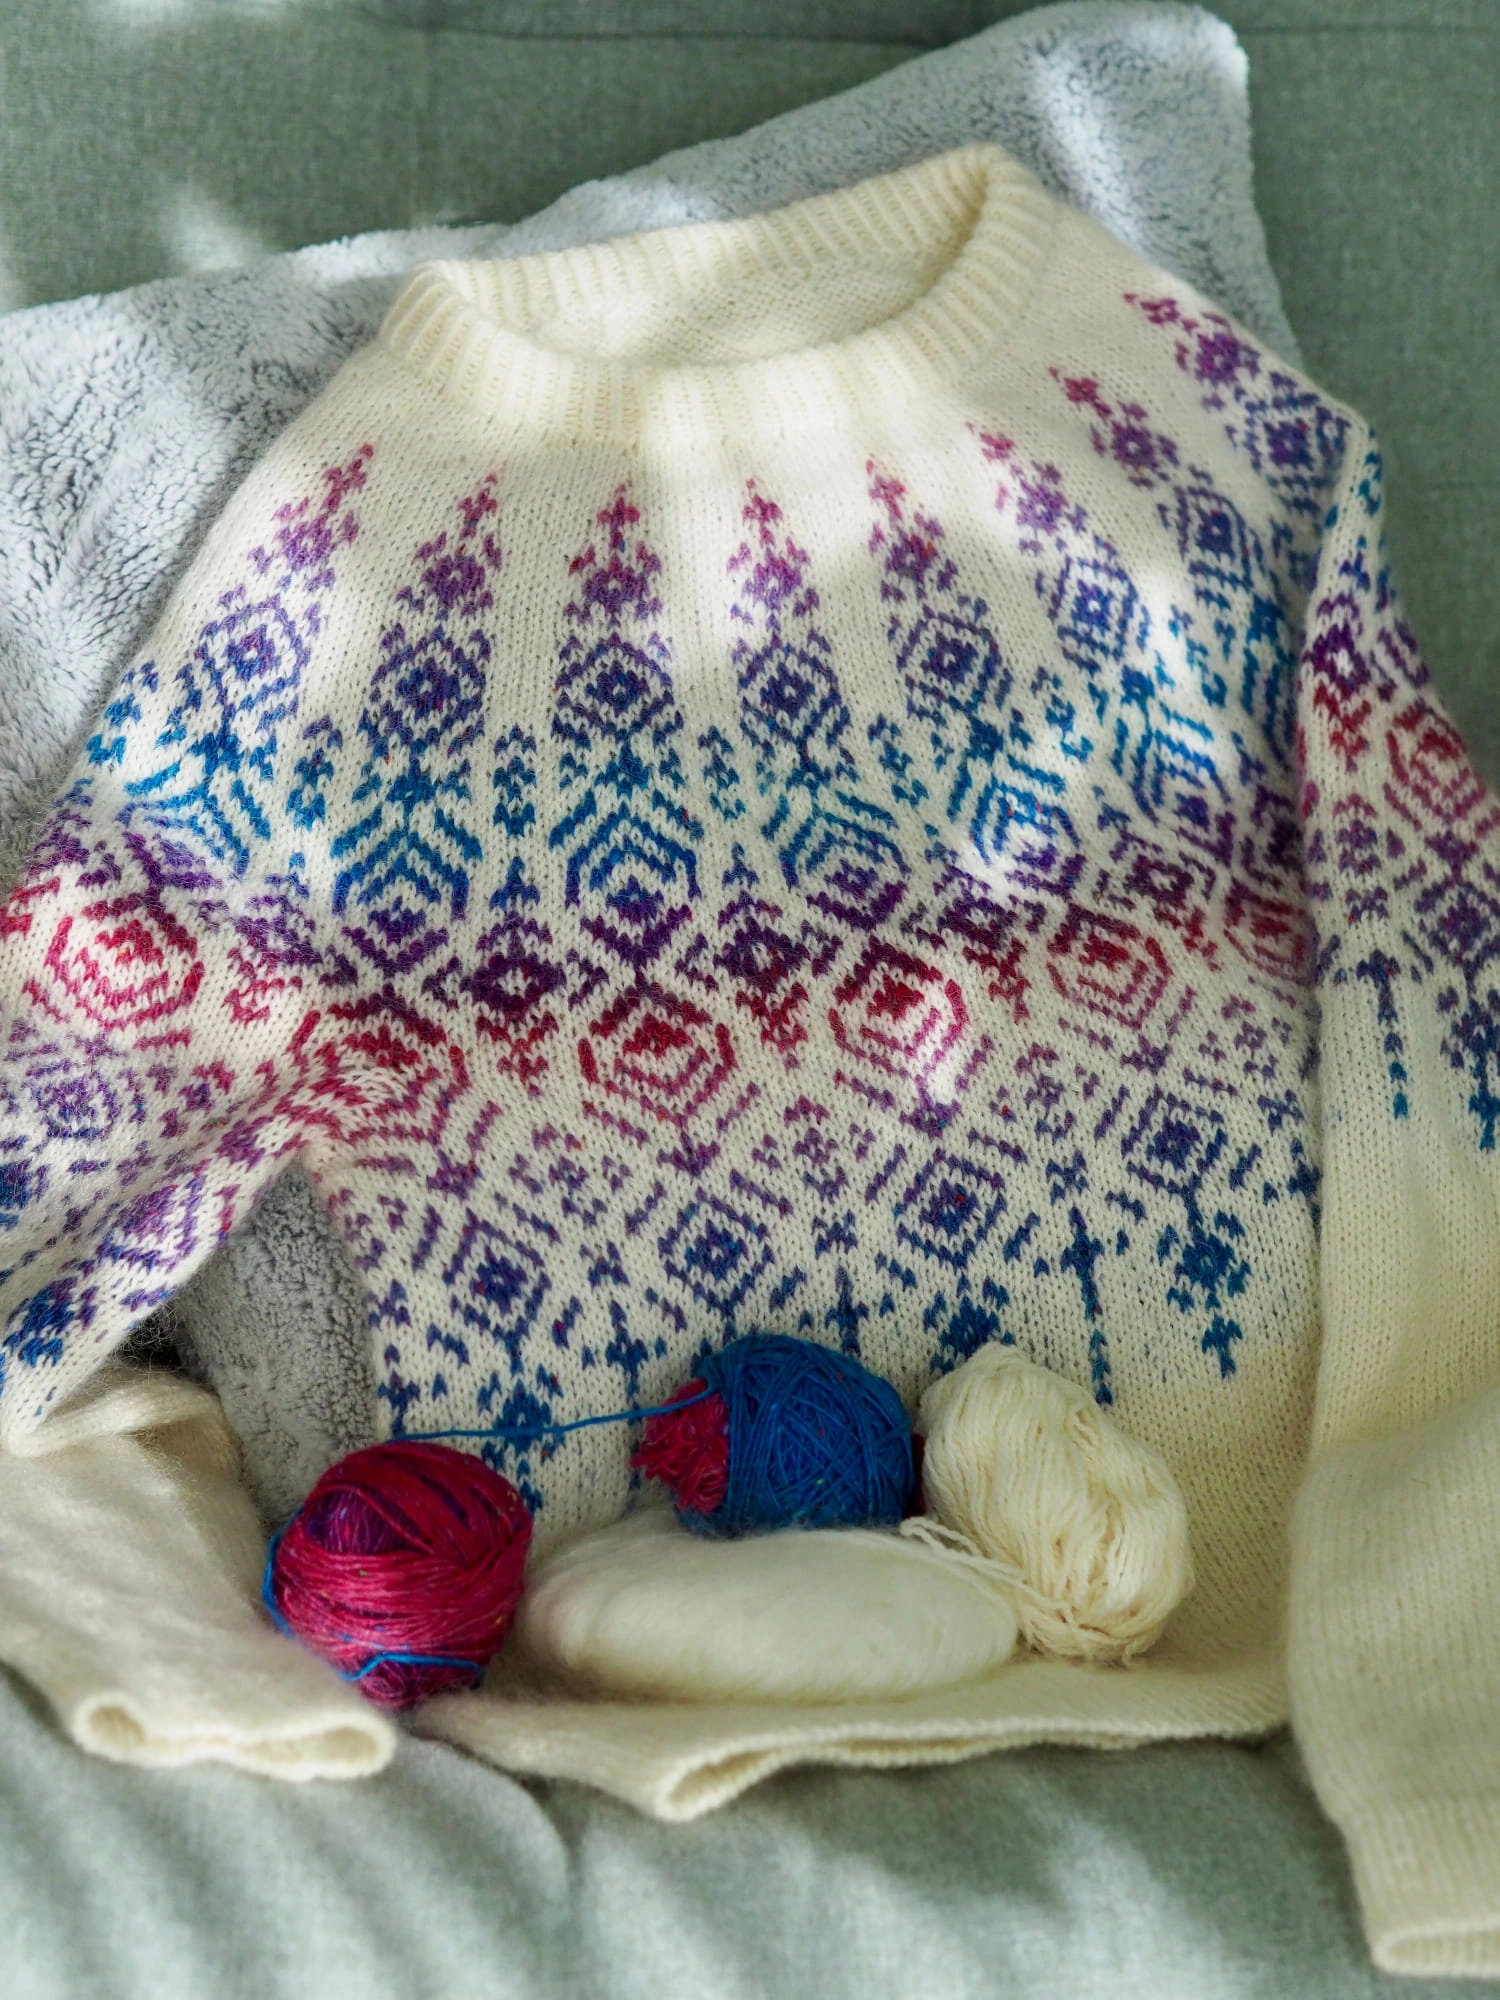
Project recap
- Ravelry: PurringYarn’s Orbits - Galaxy Ver.
- Time spent: 77 hours
- Yarn:
- Rosalinda Colorful Clouds 云彩段染 (05)
- 悸动 Wool (芝士)
- 慕顏 Mohair (05 Cheese)
- Needle: 3.25mm (body), 2.75mm (rib)
- Gauge: 24.5 sts = 4inch
- Duration: -
- Pattern: Orbits by Rachel Illsley
The story
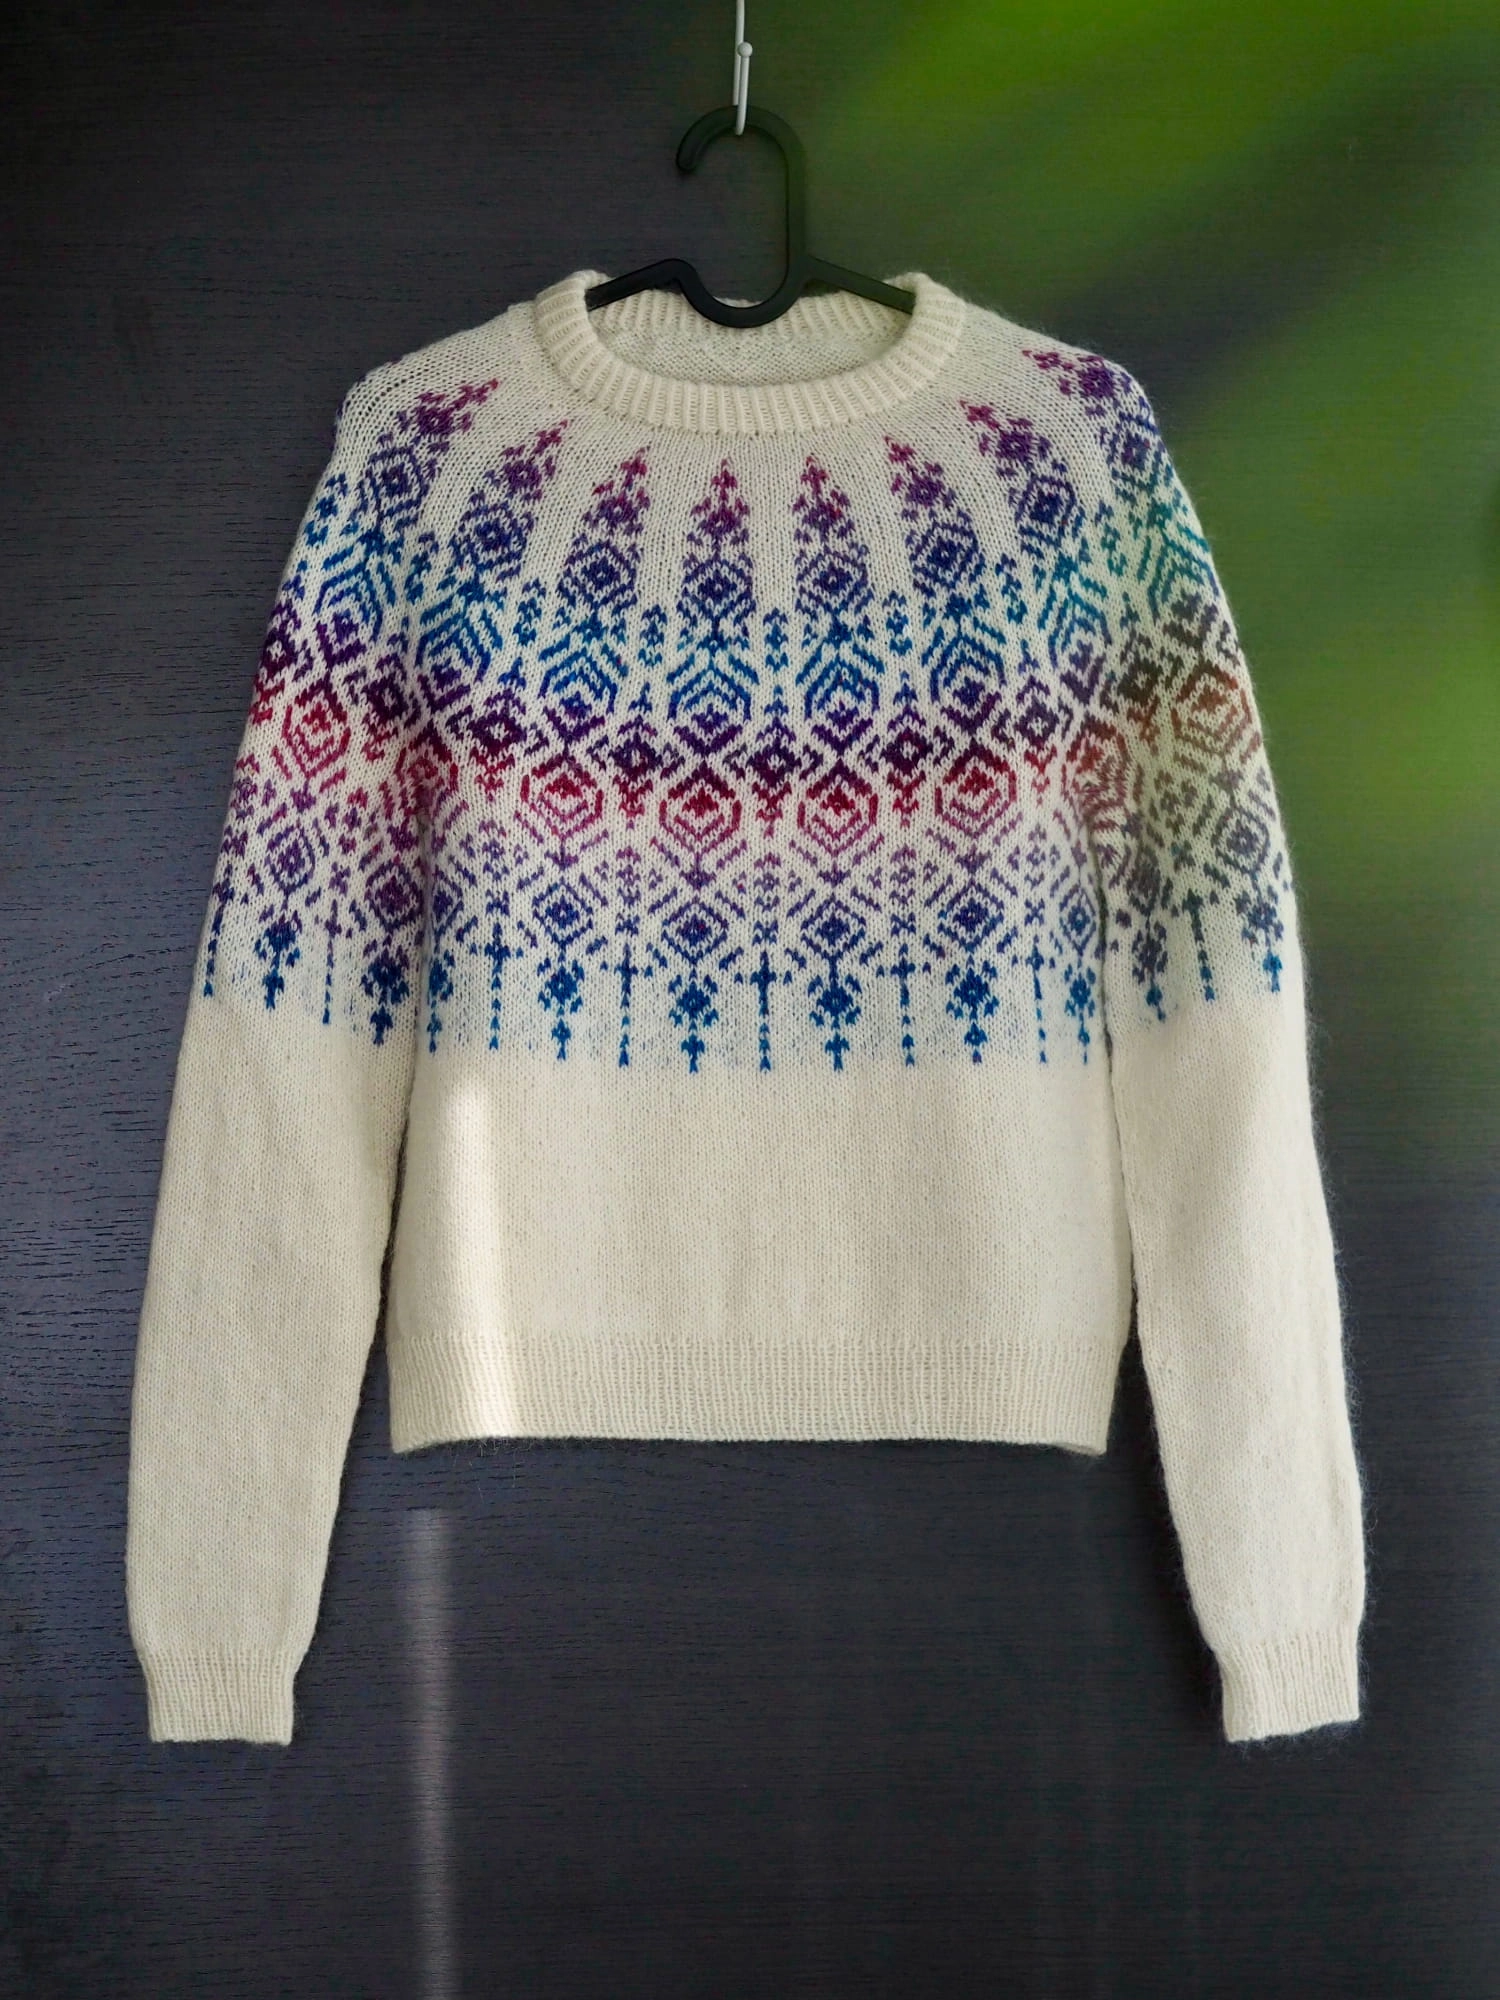
This pattern has been in my library for a while, and it’s another Pattern first, Yarn second recipe. When I first saw the pattern, I knew I needed to find a galaxy palette yarn to match it. And I found it! The long colour gradient really suits the pattern.
Yarn notes
 The white wool yarn is thinner than a standard fingering weight, and I was worried it wouldn’t match the gradient yarn, so I bought some mohair and held the two together to get a fingering weight. It worked great! Even better, the mohair added that lovely halo, and thanks to yarn dominance, the CC still stands out even though the MC is fluffier.
The gradient yarn is… beautiful. I really enjoyed working with it! It’s such a pleasure to watch each colour unfold through the chart. The galaxy colour palette is such a good match for this colourwork. Absolutely beautiful. I couldn’t stop knitting the colourwork!
Pattern & modifications
Provisional cast-on for a folded neck. When I reached the fold line, I used a three-needle bind-off to knit the two layers together.
For the colourwork chart, I used the Ladderback Jacquard technique, placing an LBJ st between each chart repeat, which made it very easy to manage and track. Note that there are plain MC rows when working LBJ, but I figured out how to handle them by myself. See Techniques.
Even though the LBJ works great, there are still rows where I need to catch floats. For the body and left sleeve, I just catch the float every 4-6 sts, but even though I’m careful not to stack them, I noticed the CC still shows up in the right side. Is there even a perfect way to avoid this problem?? Anyhow, I decided to add LBJ sts at these sections when I’m doing the right sleeve as shown in the wrong side. It does look much better. My take away: if you want perfect result, don’t be lazy and go with LBJ.
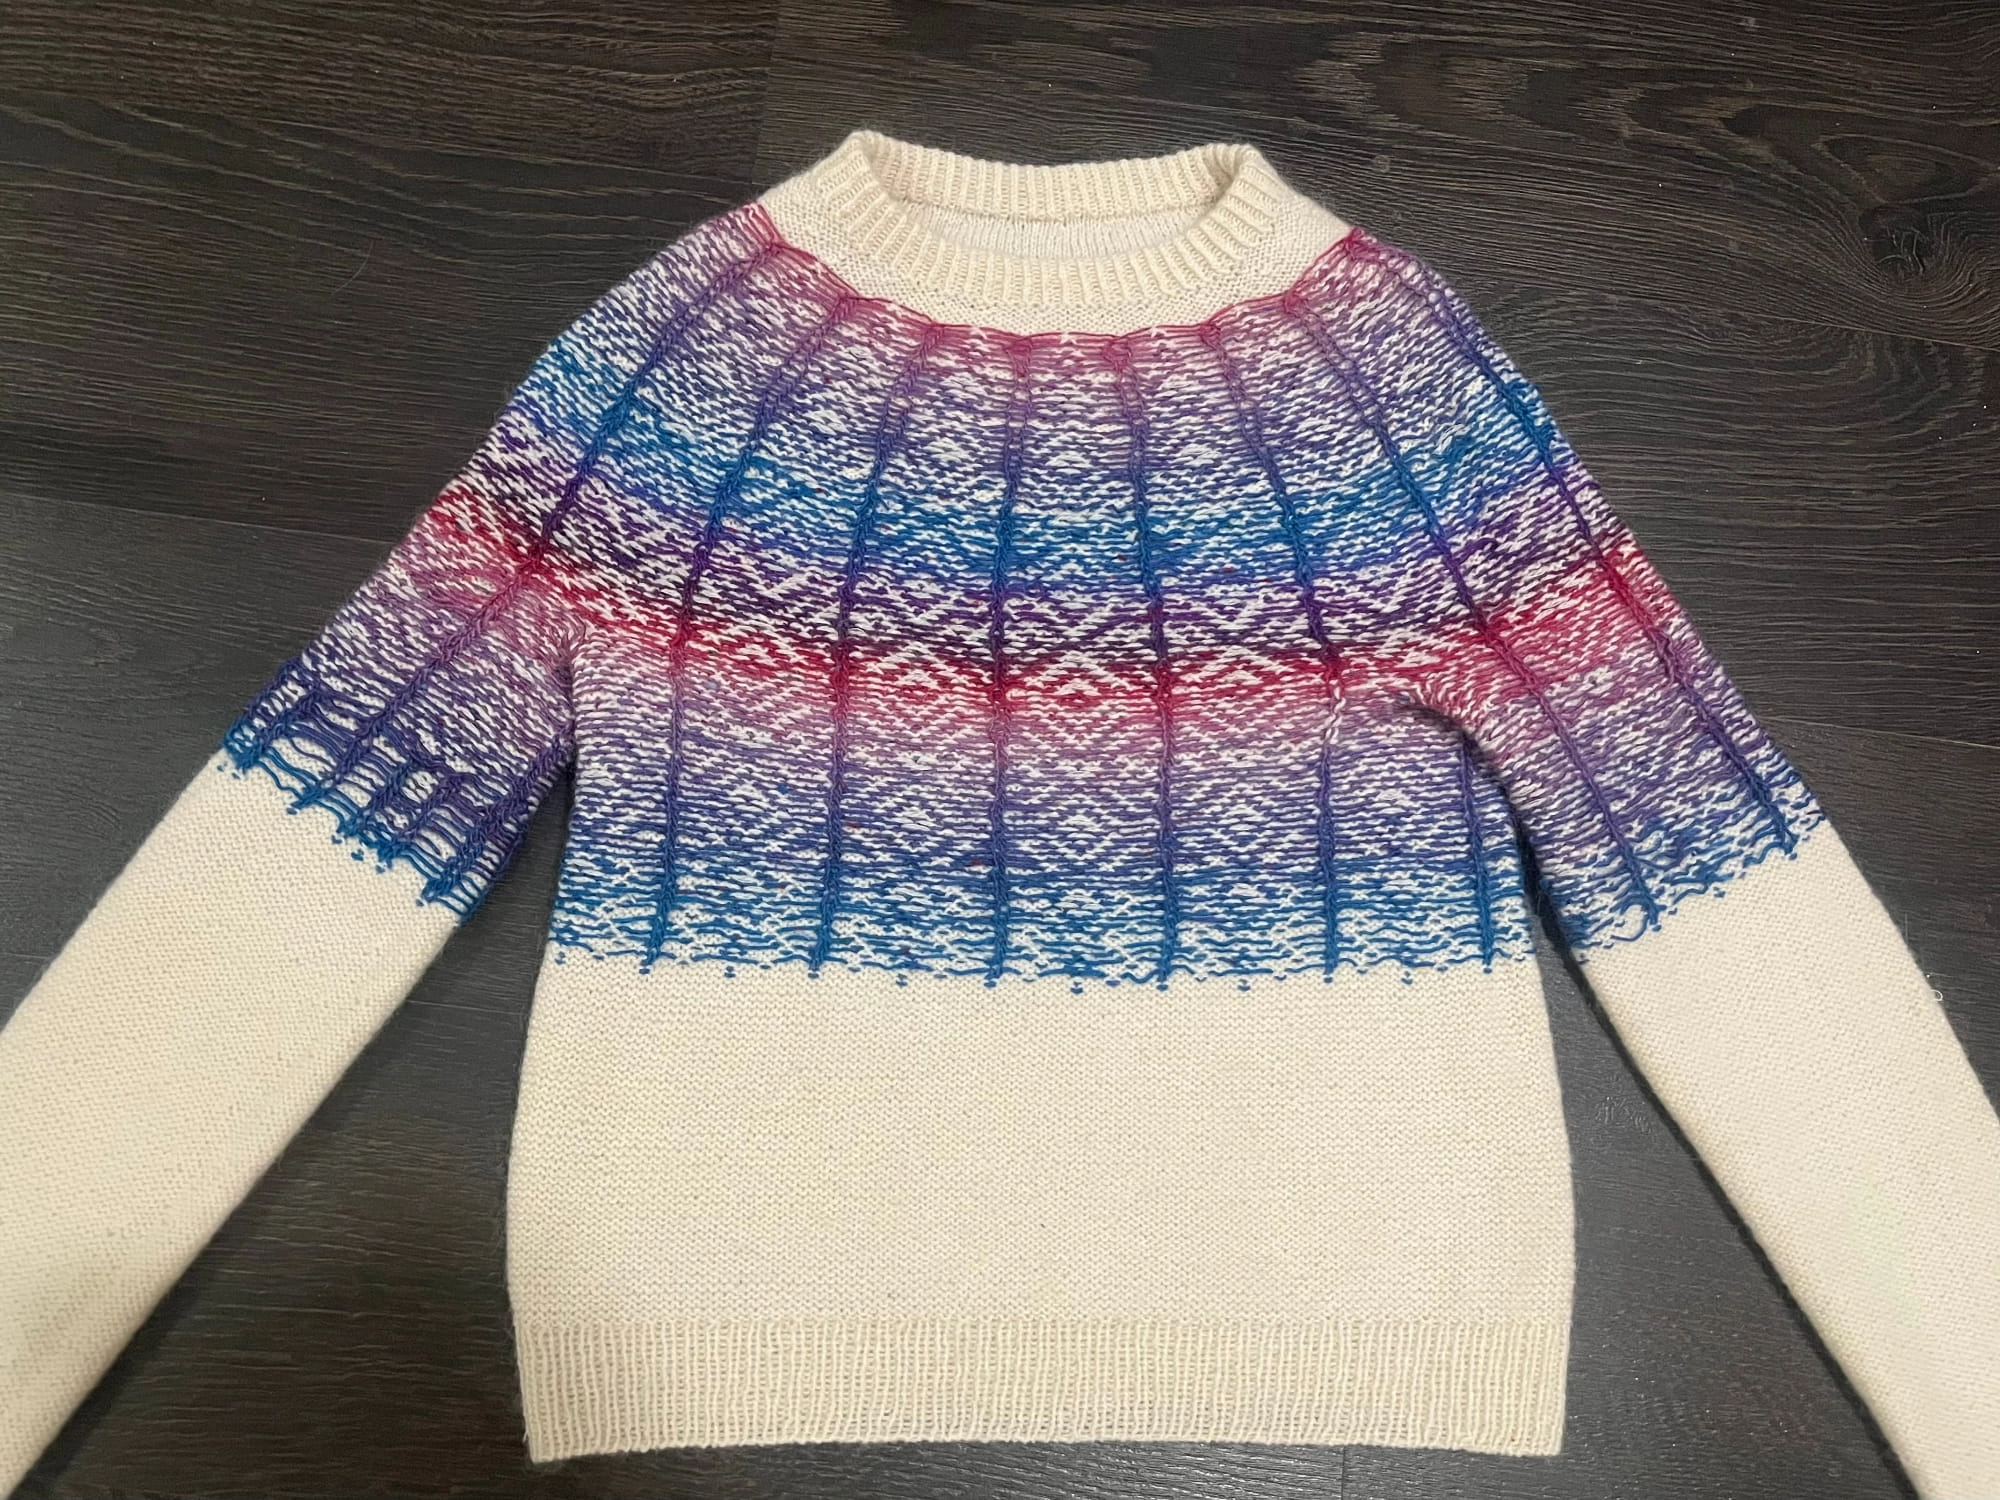
Figure 1: Look at the beautiful wrong side.
The underarm is a bit tricky because I couldn’t simply increase stitches with the colourwork going on. I used an “avoid underarm holes” tip from IG, which is basically to pick up two extra sts from the strand below, twisting the mount on both, and knit three together with the next (original) stitch on the left needle. It works wonders.
Because I only had one skein of CC, I had to manually match the sleeve colours to the body. Once I finished the body colourwork, I unwound the remaining CC yarn and split it into 5 different colours. From there, I divided each colour in half and ended up with approx. 2.5g to 3g for each colour section. This turned out great - the sleeves matched the body almost exactly! Lots of ends to weave in on the sleeves for sure, but I’m so proud of my work.
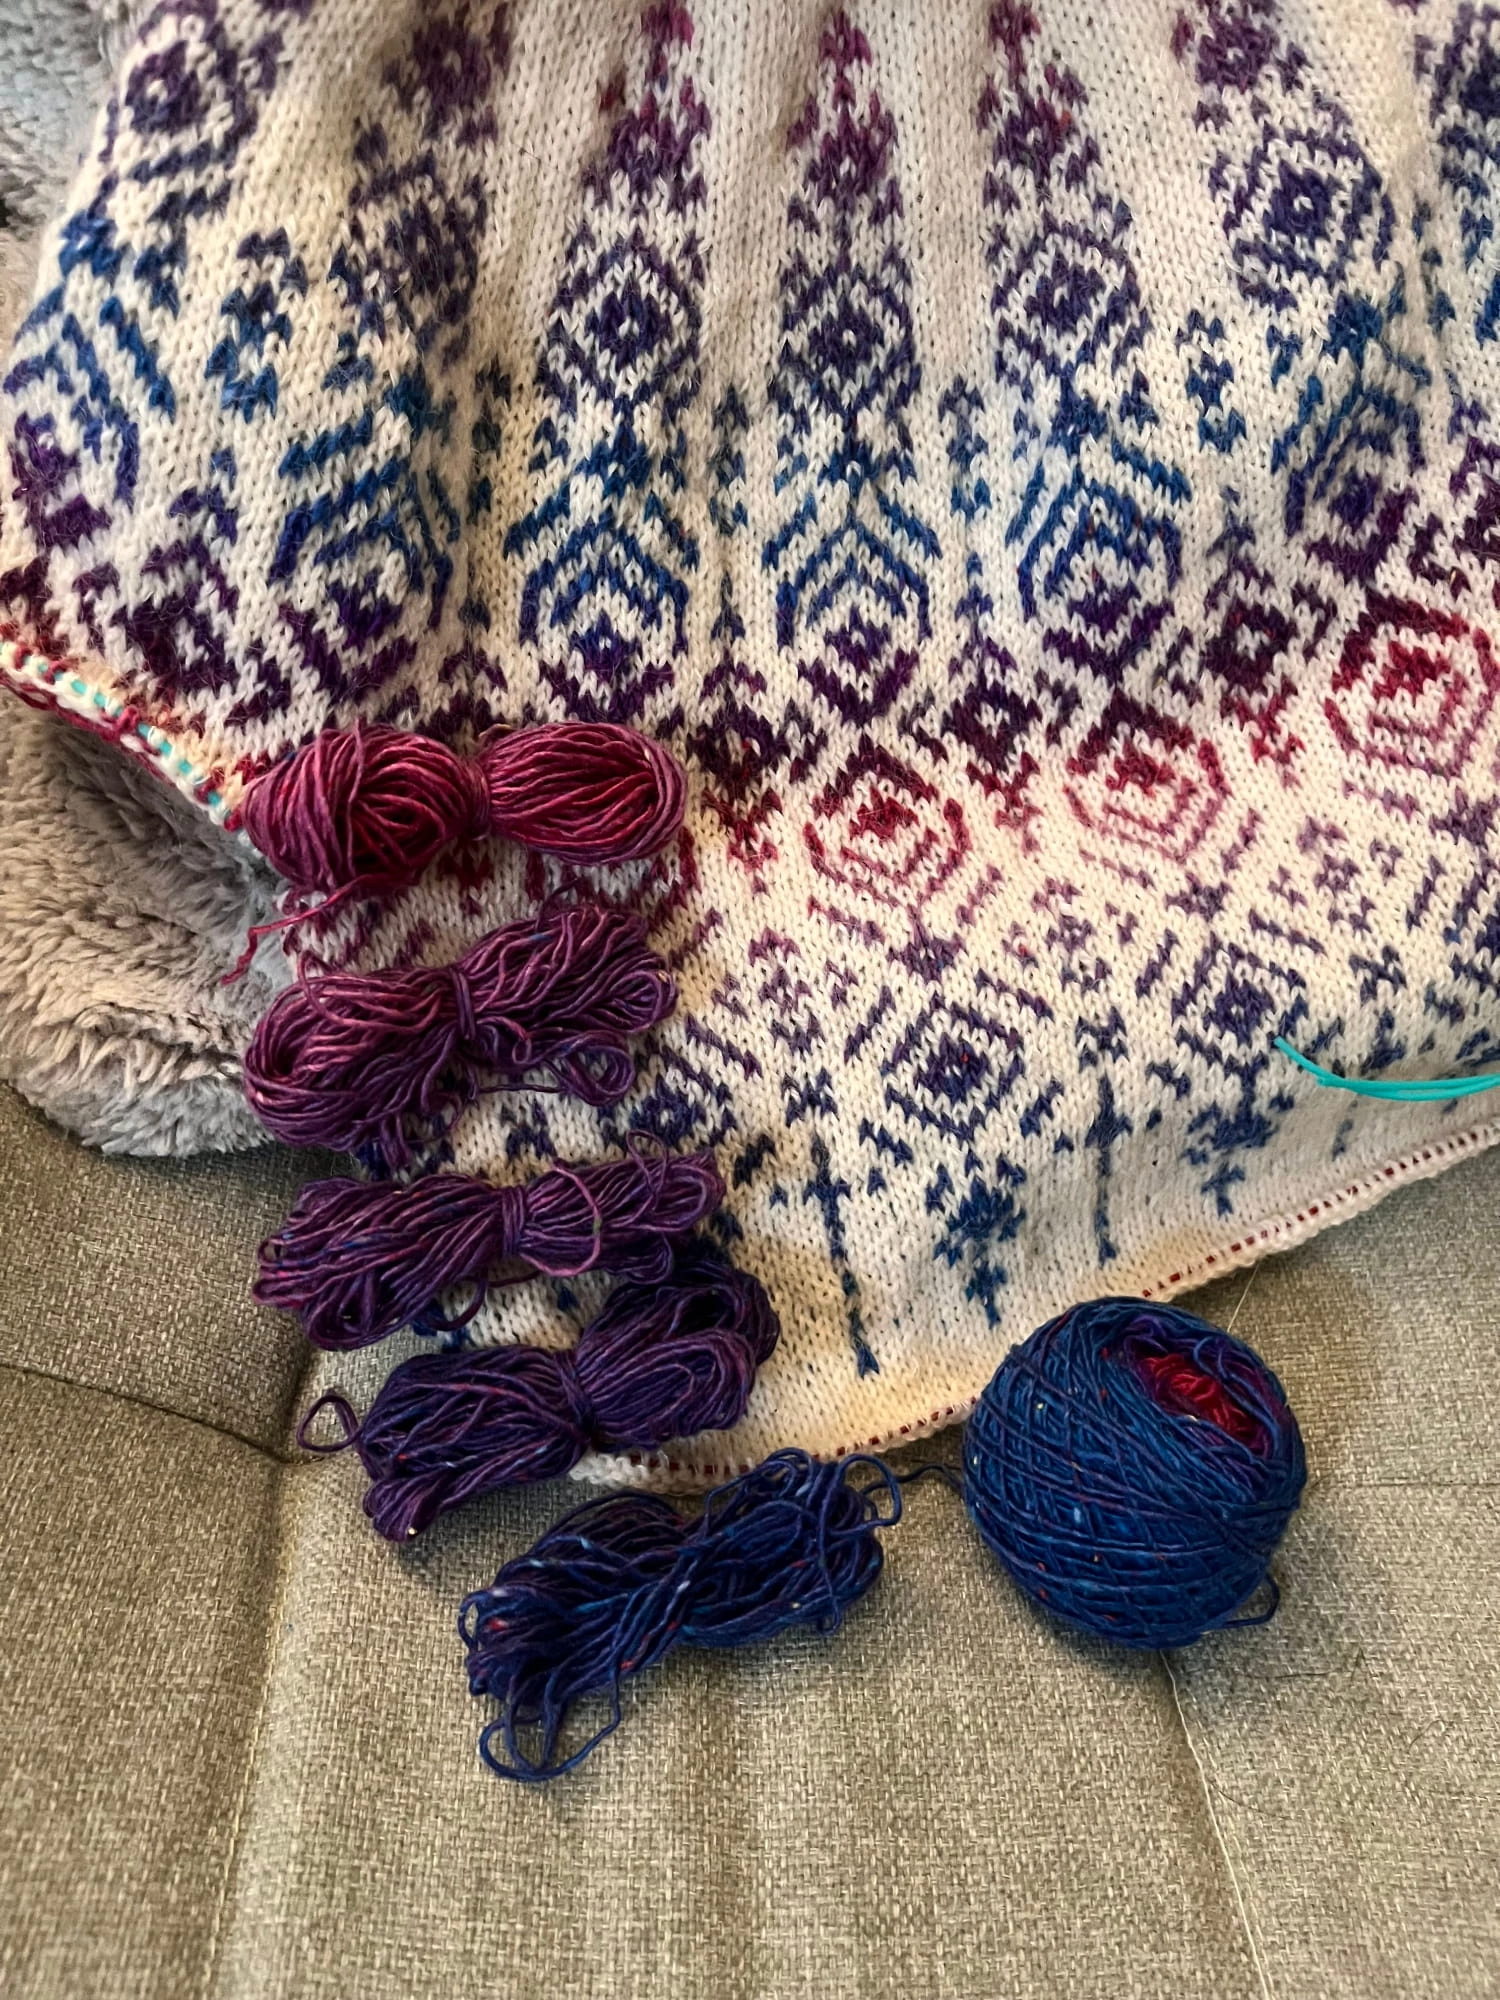
Figure 2: Manually spliting one ball of yarn into matching colours
Sleeve decreases: decrease until 52 sts remain. Also, even though I shortened the sleeves, they’re still a bit too long after blocking.
1x1 standard ribbing and Italian bind-off for both sleeves and hem. I feel like I can never go back to the days before Italian bind-off. So neat… and I actually enjoy doing it. Same with Kitchener stitch.
Size & fit

I knit size XS. My gauge swatch was only a tad tighter than the pattern (24.5 sts vs. 24), but my final gauge on the sweater was tighter, most likely due to the colourwork. As a result, the chest was supposed to be 90cm but I got 80cm. Not a big deal for me, as I quite like the fitted look with only +3 positive ease.
Finished measurements:
- Chest: 80cm (+3 positive ease)
- Sleeves: 47cm from underarm to cuff. I didn’t follow the sleeve length in the pattern since this was already long enough. It lengthened a bit after blocking. I like long sleeves so I’m fine with it, but I should be careful next time.
- Length: 54cm. The body length is perfect. I think ~55cm is the sweet spot for me.
- Neck depth: 6cm. I think 6.5cm would be better, but at least it doesn’t rub my neck.
Techniques
- For the 1x1 ribbing, I used the neater ribbing method (eastern knitting) for the sleeves and hem, but didn’t find much of a difference… I’m not very satisfied with the hem but too lazy to frog it, so I decided to leave it be.
- How to carry the LBJ when working a plain row: when I hit a plain MC row in the middle of colourwork chart while the Ladderback Jacquard is still in place, the way to keep the LBJ going is to drop the CC yarn and work the plain row with MC. When I get to the LBJ st, I simply bring the yarn to the front and slip it, similar to the standard LBJ technique, but just slipping. I was surprised I couldn’t find any resources on this, but I figured it out by myself and posted a short video tutorial on IG.
Next time
- I’ll keep practising standard 1x1 ribbing. However, next time I’ll try a Japanese knitting method: increasing the stitch count by approx. 15-20% and knitting the ribbing on much smaller needles. Maybe I’ll do an experiment, comparing 1×1 ribbing on needles 0.75mm and 1.0mm smaller than the body needles, with 10%, 20%, and 30% additional stitches.
Knitting journal
Decided to put the hooded scarf aside and start with this first.
As usual I’m knitting the smallest size. Folded collar looks nice, but I don’t want to deal with the CO edge so I decided to do a provisional cast on instead. I think this is actually my first time doing provisional cast on in the round, so a little confused about whether I should join the round for the waste yarn. Found a YouTube tutorial about this so followed what she did. I also looked at Suzanne B’s other tutorial which is casting on directly on the cable. It is quite interesting, but after trying by myself I found it would be way too fiddly for joining in the round, and I don’t want to mess up with over 100+ CO sts. Hence I’m just gonna to go with my previous method. I’ll have a lifeline anyways so just one more step.
- 5 days later
I just LOVE working colourwork! It feels so addictive for some reason. Yesterday I just started the yoke chart and today I’m only 15 rows away from separating the body and sleeves. I just can’t slow down - it’s too exciting and satisfying to see how the colourwork turn out as I finish each round.
- 4 days later
This is going so fast. I’ve completed the colourwork of the body and going to do the plain stockinette in white only. The problem for me is the yarn - I need to find out how to make the sleeves match the colours of the body. First of all, I unwind the yarn to find out where the colour begins (pink-red) and I go from there to find the sequential colours. From what I found, the remaining skein only contains one complete sequence, as I only have one skein so my best bet is to divide each colour section in half so that the two sleeves will at least match with each other. When I measure the length, each colour section weighted from 2.5 gram to 3gram, and it doesn’t seem they will produce the same number of rows as the body. Hope I’m wrong on this. Well, this is the best solution I can do now. Let’s see!
- 2 days later
Weighted the 4 bobbins:
- pink-red: 2.5g
- lilac: 2.4g
- medium purple: 2.4g
- dark purple: 2.9g
- blue: not counted - colourwork should end here
- 4 days later
Almost finish one sleeve, only the ribbing left. I’m going to do standard 1x1 rib instead of twisted rib, using the my perfect ribbing technique aka eastern uncrossed knitting as follows.
- Prep row 1: knit normally one row with 0.5mm smaller needle
- Prep row 2: eastern knit one row
- 1x1 Rib in Easter uncrossed knitting: eastern knit + eastern purl
Notes for the yarn bobbins:
- Pink red: the end of R7
- Lilac: finished 1st rep of R3 in Chart 2
- Med purple: almost finish R8
- Dark purple: first rep of R18
- 3 days later
Finished another sleeve tonight. I’m at half way of the hem, so it should be able to finish tomorrow.
There will be a lot of weave in ends for sleeves as I have to manually match the colours… To be honest, when I’m actually doing weave in ends it’s not that bad, but every time I still kinda hate to do it.
I might unravel few rows of the ribbing of the sleeve I did tonight because it looks too long. Unravelling Italian bind off is a tedious task… More work for tomorrow I guess.
From the knitting circle
Comments